This guide is intended to provide a quick overview of the most important aspects of gameplay in Steel Division, reducing the learning curve.
The Basics
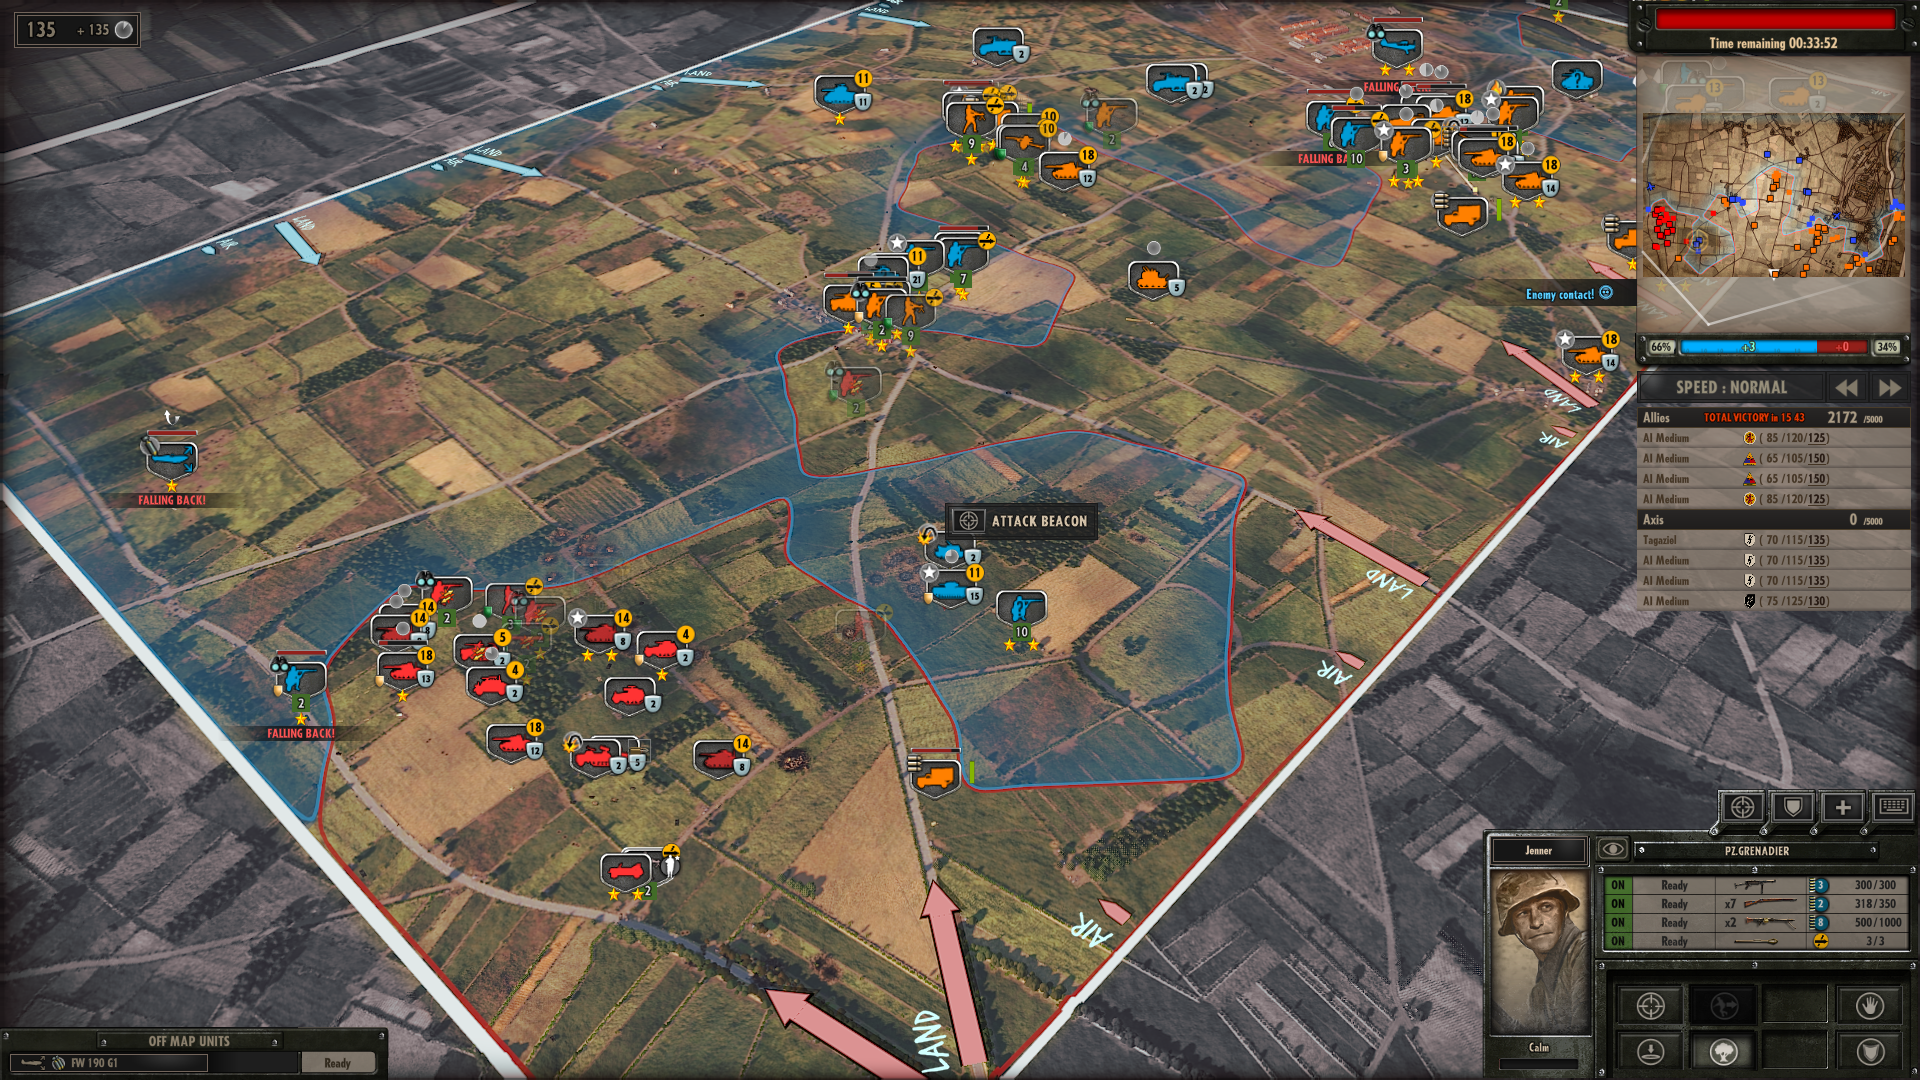
The frontline. Blue represents your own forces, red the enemy's. In this case, the Allies created a salient close to the Axis home base, denying one of the reinforcement routes and threatening the left flank. Notably, this is an untenable position, as cutting the salient off with a thrust will encircle the enemy tanks. In this situation, they do not lose suppression (unless they are airborne units).
- The most important thing for any wannabe division commander to remember is that Steel Division is not Company of Heroes, but essentially Wargame in World War II. As such, it's a lot less gamey, emphasizing proper use of tactics and combined arms.
- To familiarize yourself with the game, play skirmish a lot. Set the maximum possible amount of players your computer can handle, set the starting resources to 250 DP and play it slowly. 1v1 games can - and will - overwhelm you if you head into them without preparation.
- Now, the battles. Unlike most tactical games, Steel Division includes three distinct phases for every battle:
- Phase (A) involves light units looking for the enemy & secure key positions.
- Phase (B) unlocks medium units to engage the enemy and try to push the frontline.
- Phase (C) unlocks all the heaviest units for a full scale battle.
- In each phase you get a limited amount of units to deploy, based on the battlegroup you've created. When starting out, using the automatic fill-battlegroup option is a good way to get a feel for the division your selected.
- Finally, maps feature a shifting frontline that not only provides a helpful guideline for tracking enemy movements (in general, if it bulges out, someone is up to no good and you might want to take care of it). Certain types of units do not affect the frontline, so keep that in mind.
Units
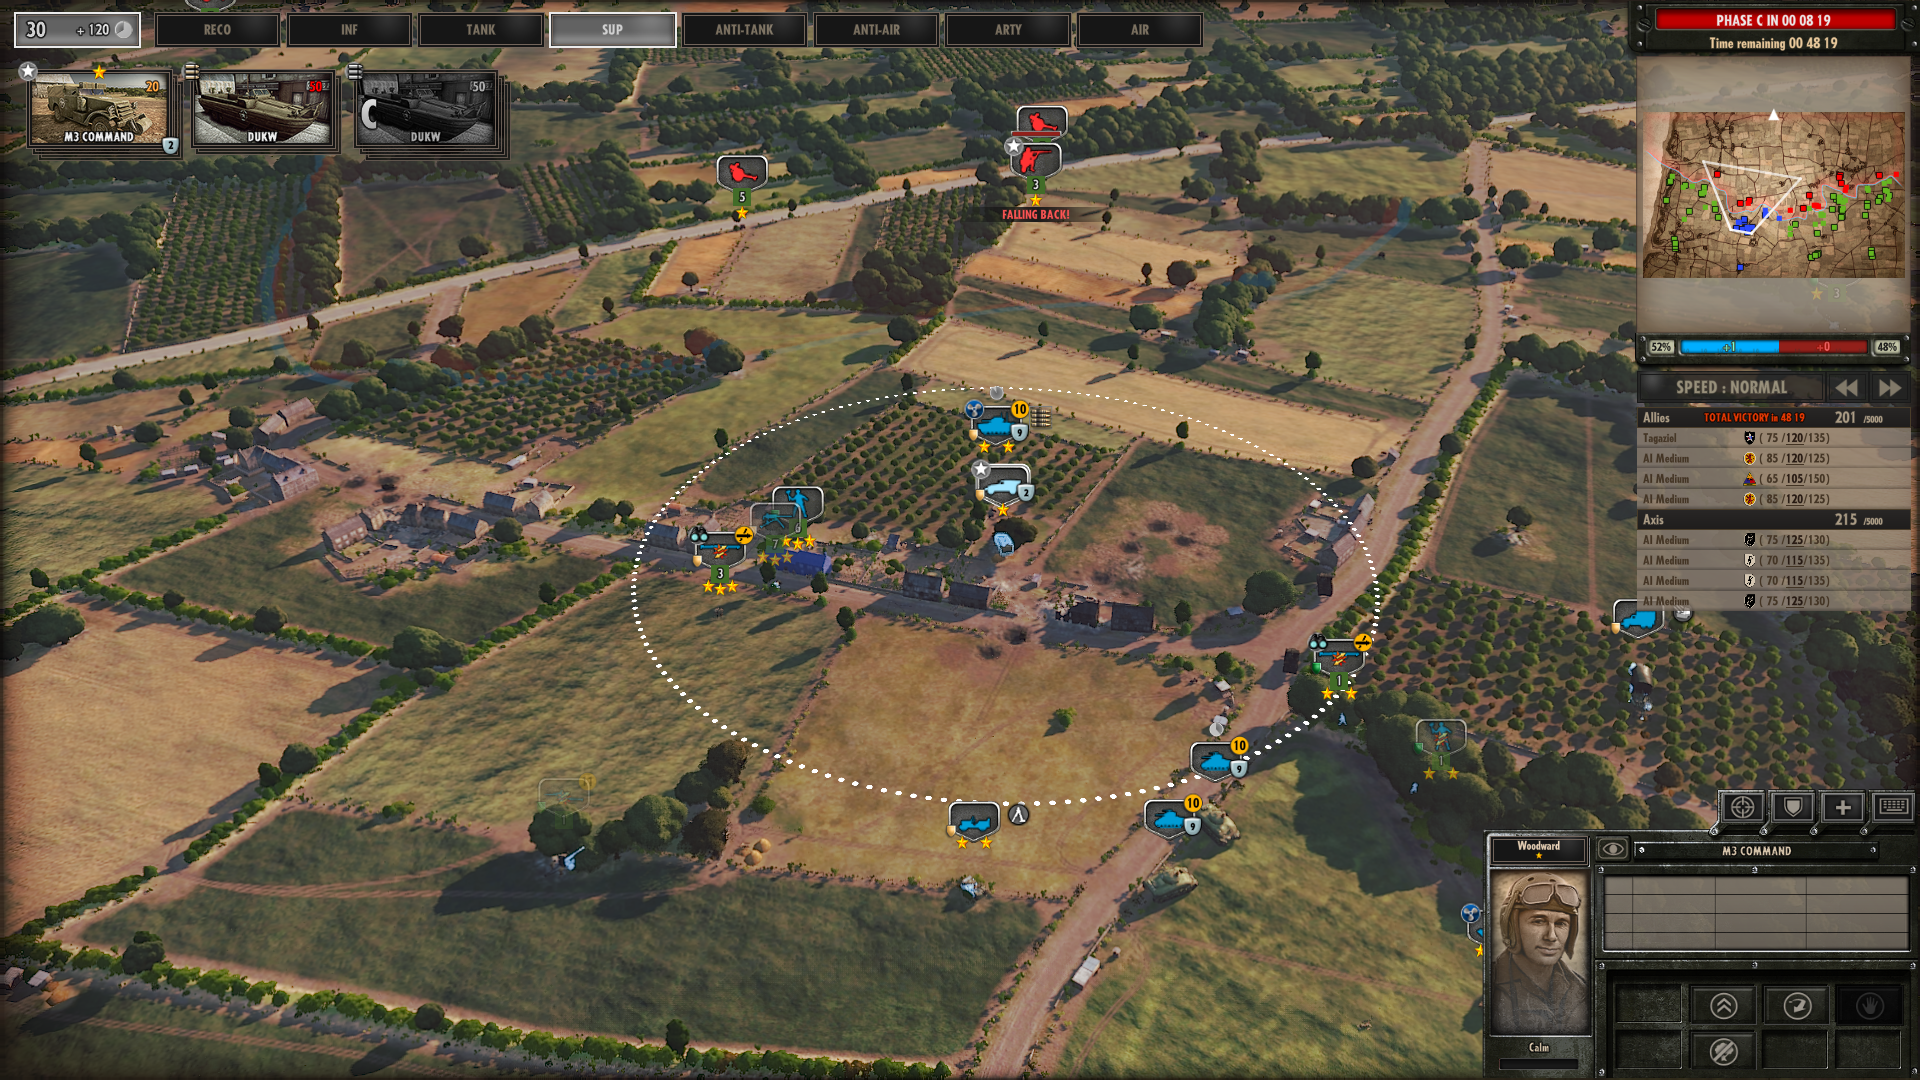
A number of American units engaging an Axis skirmishing force. M4A1 tanks remain back to support the advance. In the center is an M3 command vehicle safely hidden in the orchard, supporting an M4A1 DD (amphibious M4A1) as it fires on the enemy.
- There are several unit types in Steel Division:
- Recon is exactly what it says on the tin. You can't succeed without recon units, as you'll be blind, deaf, and at the mercy of enemies who do have those. Recon infantry is excellent at stealth too, easily able to evade detection even with enemy units passing nearby. As long as you tell them to Return Fire (Z) they won't attack first, making them excellent sentries.
- Infantry is a broad category that features foot soldiers with transports. Depending on your division, infantry can be its mainstay or merely a way to patch the frontline. Notably, infantrymen and crew-served weapons are the only unit types capable of entering bocages and hiding in buildings, gaining excellent protection and concealment.
- Tanks include both turreted vehicles and German tank destroyers. Tanks vary greatly by division, ranging from the dependable and reasonably powerful Shermans for the United States, through the lightweight Stuarts available to British units, to obsolete Beutepanzer of the 91. Luftlande, where you're fielding antiquated Hotchkiss and Renault tanks that date back to the 30s just to have something with treads.
- Support units encompass resupply vehicles and fire support vehicles such as the Churchill AVRE or Hanomags with low-velocity tank guns.
- Anti-tank units are precisely what it says on the tin. These include squads of infantry with Panzerfausts, Bazookas, and PIAT launchers, anti-tank guns, and tank destroyers.
- Anti-air units are a bit of a misnomer, as ground-based AA usually scares enemy flyers away, with dogfighters being the superior method for shooting enemy planes down. Their key advantage lies in their ability to engage ground targets as well, making them potent tools against infantry (particularly units with an extreme rate of fire, the Wirbelwind is basically a meat grinder) and tanks (FlaK 88 needs no introduction).
- Artillery units allow you to hit the enemy with indirect fire (most) or by directing off-map artillery assets using observer units. In general, artillery primarily serves as a way to suppress the enemy or rout them. Of course, it all depends on the size of the gun you use: Mortars are unlikely to scare tanks or large infantry attacks, but when Stuka zu Fuss (Wurfrahmen) starts firing, it's another tale entirely.
- Air assets cover a variety of classes, from classic dogfighters through planes carrying rockets for close air support missions, to bombers allowing you to level enemy positions and force a breakthrough.
- Certain units are distinguished by a white star on a gray background. These are Leaders and are very important, and impact nearby units in four ways: increasing their experience by one level, preventing surrender, allowing a surrounded unit to function normally, and halving the suppression damage received.
Combat
- Infantry is very squishy and easily suppressed by automatic weapons, especially in the open. Anti-air weapons mounted on vehicles are particularly effective at mulching and forcing infantry to flee. However, if your vehicle or emplacement only deal AP damage (black on yellow in the weapon bar), it won't be able to attack infantry.
- Vehicles take more effort to shake up and beat back, usually taking sustained artillery barrages or exchanges of fire to frighten. Furthermore, while infantry is squishy, vehicles tend to be durable and take a beating, depending on their armor. In general, dedicated armor-piercing munitions are best for taking vehicles down.
- In both cases, you need to account for morale: As they come under fire, units suffer morale loss: They become shaken, then pinned down, until finally they are routed if they are not relieved or the attack continues. Routed units automatically fall back. If an enemy unit enters close combat range (below 100m) and there's no friendly unit nearby, then the routed unit will surrender. This is a very effective tactic for dealing with enemy forces.
- Of course, no unit type is clearly superior over another. Everything depends on the circumstances: While infantry and crew-served weapons are very vulnerable in the open, if they make it to cover they are much more durable and can eliminate entire platoons of heavy vehicles with the right weapons. A tank driving close to a bocage or a building is liable to be destroyed by a well-placed shot from an anti-tank gun or a hand-held anti-tank launcher with a HEAT warhead.
- Finally, even if hidden, a unit will be seen by the enemy as soon as it uses its weapons.
Battlefields
- Every battlefield is unique and it pays to play through them at least a couple of times in skirmish mode before tackling human opponents. The landscape and its features dictate your tactics, however, the following general rules apply to all:
- Line of Sight is all. Use the LoS tool (C) to display what can be seen from the position under your cursor. Use this tool frequently to maximize your units' field of fire, find blind spots, and set up ambushes. Of course, remember that if you can see a position, your enemy will typically be able to see you with good optics.
- Infantry and crew-served weapons can hide in bocage, forests, and buildings, gaining excellent cover and concealment. Hide a tank gun and a machine gun nest in one together with a recon unit and you can hold off an enemy force for a good while.
- Heavy bocages and forests are like natural walls: infantry can get through them, but not vehicles. Infantry, flamethrower units, and vehicles with automatic weapons excel at clearing them. Buildings and towns are trickier, but remember that infantry units can launch an assault inside a building and engage its occupants in close combat.
- However, vehicles can hide in orchards and near vegetation (the cursor is highlighted yellow), gaining a measure of protection too. In general, never get caught out in the open, especially if you're running an infantry-heavy deck.
Keyboard shortcuts
- Most keyboard shortcuts carry over from Wargame. While most streamline the game, the Line-of-Sight tool is absolutely indispensable.
- Press C to display the line of sight from the position of your cursor. Always use it when you order your troops to occupy a position.
- Press U to disembark the transport unit's passengers at the present location.
- Press Y + left click on the map to disembark the transport unit's passengers at a given location.
- Press A for the unit to move under cover (as much as possible) until spotting an enemy, then stop and engage it.
- Press T to fire on a given position.
- Press B to fire smoke rounds.
- Press F to move fast using the road network. Unit won't stop its movement even if spotting an enemy or being engaged.
- Press I to display the unit's stats sheet.
- Press G to call in an off-map artillery strike.
- Press SHIFT to display the unit's ongoing order(s).