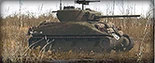
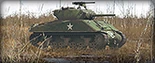
3rd Armored (SD2) is an A-rated Allied Armored division in Steel Division II, available as part of the Back to War pack.
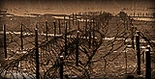
Suffering for weeks in "hedgerow hell" and the heavy fighting for Saint-Lô, the "Spearhead" finally broke into rolling country with Operation Cobra. From then, true to its nickname, the 3rd Armoured engaged in a race towards the Seine, capturing tens of thousands of German troops in the process.
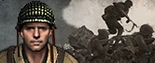
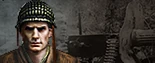
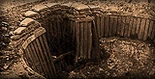
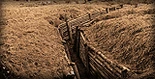
Leading his heavy division through the Cotentin's 'hedgerow hell', Watson had to adapt and develop new tactics to fight in such a close environment. A WW1 infantry veteran, Watson transferred to the forming armoured forces in the Interwar, rising to command of his own armoured regiment in 1940. Given command of 3rd Armoured Division, he led it through the Normandy campaign, especially the vicious fighting in the bocage and for Saint-Lô. Afterwards, he played a major part in the American breakthrough out of bocage country and in the battle of Falaise. Yet, he was soon to be demoted and stripped of his command by Eisenhower for having let a major tank and truck jam develop behind the lines. But by the end of the war, he had recovered his general’s stars and was back leading an infantry division.
Real world composition[ | ]
- Headquarters Company
- Service Company
- Combat Command A
- Combat Command B
- 36th Armored Infantry Regiment
- 32d Armored Regiment
- 33d Armored Regiment
- 23d Armored Engineer Battalion
- 83d Armored Reconnaissance Battalion
- 143d Armored Signal Co
- 3d Armored Division Artillery
- 391st Armored Field Artillery Battalion
- 67th Armored Field Artillery Battalion
- 54th Armored Field Artillery Battalion
- 3d Armored Division Trains
- 3d Ordnance Maintenance Battalion
- Supply Battalion
- 45th Armored Medical Battalion
- Military Police Platoon
Battlegroup[ | ]
| Activation Points | Battlegroup slots | ||||||||
|---|---|---|---|---|---|---|---|---|---|
| Recon | Inf | Tank | Sup | AT | AA | Art | Air | Defense | |
| Total | 5 | 5 | 10 | 8 | 6 | 3 | 7 | 4 | 4 |
| 1 AP | 2 | 2 | 5 | 4 | 2 | 3 | 2 | ||
| 2 | 2 | 2 | 3 | 3 | 2 | 1 | 2 | 1 | |
| 3 | 1 | 1 | 2 | 1 | 1 | 1 | 1 | 1 | |
| 4 | 1 | 1 | 1 | ||||||
Available units[ | ]
Recon[ | ]
| Unit | Cost | Cards | Phase A | Phase B | Phase C | ||||||
|---|---|---|---|---|---|---|---|---|---|---|---|
 |
10 | [2] | 6 | 4 | 12 | 8 | |||||
 |
15 | [2] | 4 | 3 | 2 | 8 | 6 | 4 | 12 | 9 | 6 |
 |
20 | [3] | 3 | 2 | 6 | 4 | 9 | 6 | |||
 |
35 | [1] | 5 | 4 | 3 | 10 | 8 | 6 | 15 | 12 | 9 |
 |
35 | [3] | 4 | 3 | 2 | 8 | 6 | 4 | 12 | 9 | 6 |
Infantry[ | ]
| Unit | Cost | Cards | Phase A | Phase B | Phase C | ||||||
|---|---|---|---|---|---|---|---|---|---|---|---|
 |
20 | [2] | 9 | 6 | 3 | 18 | 12 | 6 | 27 | 18 | 9 |
 |
25 | [1] | 3 | 2 | 6 | 4 | |||||
 |
25 | [1] | 3 | 2 | 6 | 4 | |||||
 |
25 | [1] | 9 | 6 | 3 | 18 | 12 | 6 | |||
 |
25 | [1] | 9 | 6 | 3 | 18 | 12 | 6 | 27 | 18 | 9 |
 |
25 | [1] | 3 | 2 | |||||||
 |
25 | [2] | 6 | 5 | 4 | 12 | 10 | 9 | 18 | 15 | 13 |
Tank[ | ]
| Unit | Cost | Cards | Phase A | Phase B | Phase C | ||||||
|---|---|---|---|---|---|---|---|---|---|---|---|
 |
30 | [1] | 3 | 2 | 6 | 4 | |||||
 |
30 | [3] | 8 | 6 | 4 | 16 | 12 | 8 | 24 | 18 | 12 |
 |
70 | [2] | 2 | 1 | 4 | 2 | 6 | 3 | |||
 |
70 | [4] | 6 | 4 | 2 | 12 | 8 | 4 | 18 | 12 | 6 |
 |
80 | [2] | 10 | 7 | 5 | 15 | 11 | 7 | |||
 |
85 | [2] | 4 | 3 | 2 | 8 | 6 | 4 | 12 | 9 | 6 |
 |
85 | [1] | 2 | 1 | 4 | 2 | |||||
 |
140 | [2] | 2 | 1 | 4 | 2 | 1 | 6 | 3 | 1 | |
Support[ | ]
| Unit | Cost | Cards | Phase A | Phase B | Phase C | ||||||
|---|---|---|---|---|---|---|---|---|---|---|---|
 |
15 | [2] | 6 | 4 | 2 | 9 | 6 | 3 | |||
 |
20 | [3] | 6 | 4 | 2 | 12 | 8 | 4 | 20 | 13 | 7 |
|
25 | [3] | 5 | 4 | 3 | 10 | 8 | 6 | 15 | 12 | 9 |
 |
25 | [1] | 5 | 4 | 3 | 10 | 8 | 6 | 15 | 12 | 9 |
 |
35 | [2] | 4 | 3 | 2 | 8 | 6 | 4 | 12 | 9 | 6 |
 |
40 | [1] | 2 | 1 | 4 | 2 | |||||
 |
40 | [3] | 2 | 4 | 6 | ||||||
 |
40 | [1] | 2 | 4 | 6 | ||||||
 |
65 | [1] | 2 | 1 | 1 | 4 | 3 | 1 | 8 | 5 | 3 |
|
70 | [1] | 4 | 3 | 1 | 8 | 5 | 3 | |||
 |
110 | [1] | 1 | ||||||||
 |
120 | [1] | 1 | ||||||||
 |
140 | [1] | 1 | ||||||||
Anti-tank[ | ]
| Unit | Cost | Cards | Phase A | Phase B | Phase C | ||||||
|---|---|---|---|---|---|---|---|---|---|---|---|
 |
20 | [4] | 6 | 4 | 2 | 12 | 8 | 4 | 18 | 12 | 6 |
 |
45 | [3] | 4 | 3 | 2 | 8 | 6 | 4 | 12 | 9 | 6 |
 |
65 | [3] | 3 | 1 | 1 | 6 | 3 | 1 | 9 | 4 | 2 |
 |
80 | [2] | 3 | 2 | 1 | 6 | 4 | 2 | 9 | 6 | 3 |
Anti-air[ | ]
| Unit | Cost | Cards | Phase A | Phase B | Phase C | ||||||
|---|---|---|---|---|---|---|---|---|---|---|---|
 |
60 | [1] | 3 | 2 | 1 | 6 | 4 | 2 | 9 | 6 | 3 |
 |
85 | [2] | 2 | 1 | 4 | 2 | 1 | ||||
 |
90 | [1] | 3 | 2 | 1 | 6 | 4 | 2 | 9 | 6 | 3 |
Artillery[ | ]
| Unit | Cost | Cards | Phase A | Phase B | Phase C | ||||||
|---|---|---|---|---|---|---|---|---|---|---|---|
 |
40 | [3] | 8 | 6 | 14 | 11 | 20 | 15 | |||
|
50 | [1] | 2 | 1 | 4 | 2 | 6 | 3 | |||
 |
90 | [6] | 2 | 1 | 4 | 2 | 1 | 6 | 3 | 1 | |
 |
105 | [4] | 2 | 1 | 4 | 2 | 1 | 6 | 3 | 1 | |
 |
125 | [2] | 2 | 1 | 3 | 2 | 1 | ||||
 |
130 | [3] | 1 | 2 | 1 | 4 | 2 | 1 | |||
 |
130 | [1] | 2 | 1 | 4 | 2 | 1 | ||||
 |
170 | [2] | 1 | 2 | 3 | ||||||
Air[ | ]
| Unit | Cost | Cards | Phase A | Phase B | Phase C | ||||||
|---|---|---|---|---|---|---|---|---|---|---|---|
 |
10 | [1] | 6 | 4 | 2 | 9 | 6 | 3 | |||
 |
85 | [2] | 1 | 2 | 1 | 4 | 2 | ||||
 |
105 | [2] | 2 | 1 | 4 | 3 | 1 | 7 | 5 | 2 | |
 |
120 | [2] | 4 | 3 | 2 | 8 | 5 | 4 | 12 | 8 | 6 |
 |
130 | [1] | 1 | 2 | 1 | 4 | 2 | 1 | |||
 |
130 | [1] | 3 | 2 | 1 | 6 | 4 | 2 | 9 | 6 | 3 |
 |
150 | [2] | 1 | 2 | 1 | 4 | 2 | 1 | |||
Defense[ | ]
| Unit | Cost | Cards | Phase A | Phase B | Phase C | ||||||
|---|---|---|---|---|---|---|---|---|---|---|---|
 |
0 | [1] | 3000 | ||||||||
 |
0 | [2] | 6 | ||||||||
 |
0 | [2] | 1500 | ||||||||
 |
5 | [3] | 3 | 2 | |||||||
|
15 | [2] | 2 | 1 | |||||||
Transport[ | ]
| Ford GPA
x 12 |
GMC
x 400 |
GMC HMG
x 24 |
Jeep
x 300 |
Jeep .30
x 50 |
M20
x 18 |
M2 HT
x 90 |
M3 HT
x 155 |
M3 Scout
x 12 |
M3A1 HT
x 65 |
M4 HST
x 12 |
WC-25
x 60 |
WC-25 HMG
x 20 | |
|---|---|---|---|---|---|---|---|---|---|---|---|---|---|
| Recon | X | X | X | X | X | X | X | X | |||||
| Scouts | X | X | X | X | X | X | |||||||
| Arm. Rifles | X | X | X | X | X | ||||||||
| Arm. Leader | X | X | X | X | X | X | X | X | X | ||||
| Arm. Leader (SMG) | X | X | X | X | X | X | X | X | X | ||||
| Arm. LMG Rifles | X | X | X | X | X | ||||||||
| Arm. Rifles (BAR) | X | X | X | X | X | ||||||||
| Engineer Leader | X | X | X | X | X | X | X | X | X | ||||
| Engineers | X | X | X | X | X | ||||||||
| Flamethrower | X | X | X | X | X | X | X | X | X | ||||
| M1919 MMG | X | X | X | X | X | X | X | X | X | ||||
| M1917A1 | X | X | X | X | X | X | |||||||
| M2HB HMG | X | X | X | ||||||||||
| Commander | X | X | X | X | X | ||||||||
| Bazooka | X | X | X | X | X | X | X | X | |||||
| M1 Gun | X | X | X | X | X | X | X | ||||||
| M5 Gun | X | X | X | X | X | X | |||||||
| Bofors 40mm | X | X | X | X | X | X | |||||||
| Mortar 60mm | X | X | X | X | X | X | X | X | X | ||||
| Artillery CMD | X | X | X | X | X | ||||||||
| M1A1 'Long Tom' | X |
| |||||||||||||||||||||||||||||||||||||||||||||||||||||||||||||||||


